
Ever dreamed of having your own putting green right in your backyard? It’s not as hard as you think! With artificial turf, you can create a space that’s fun, low-maintenance, and perfect for practicing your short game. In this guide, we’ll walk you through everything you need to know about making your own backyard putting green.
Key Takeaways
- Pick the right type of artificial turf designed for putting greens.
- Plan your layout carefully to make it both functional and fun.
- Prepare the ground properly to avoid issues later on.
- Install the turf with attention to detail for a smooth finish.
- Add personal touches like flags and landscaping to make it unique.
Choosing the Right Artificial Turf for Your Putting Green
Understanding Different Types of Artificial Turf
Picking the right artificial turf is the first step to building the perfect putting green. Not all turf is created equal, and understanding the differences can save you headaches later. Some options are designed specifically for putting greens, offering a low-pile height and tight weave for smooth ball roll. Others are more general-purpose and might not give you the same precision. Make sure to match the turf to your needs.
Factors to Consider When Selecting Turf
When shopping for turf, there are a few key things to keep in mind:
- Face Weight: Look for a turf with a face weight of 40-60 oz. per yard. This ensures the turf is dense and durable. Optimal putting green turf with this weight will give you the smooth roll you need.
- UV Resistance: If your green will be in direct sunlight, choose turf that won’t fade or degrade over time.
- Drainage: A good drainage system is critical, especially if you live in a rainy area. Turf with built-in drainage holes can prevent water pooling.
Benefits of High-Quality Turf for Putting Greens
Investing in high-quality turf pays off in the long run. You’ll get a surface that mimics the feel of a real golf course, making your putting practice more effective. Plus, durable turf stands up to wear and tear, so you won’t be replacing it anytime soon. It’s also low-maintenance—no mowing, no watering, and no worrying about bald spots.
A well-chosen turf can transform your backyard into a golfer’s paradise, giving you the perfect space to practice and relax. Ensure your backyard putting green stays lush and perfect with a reliable irrigation system. Explore our Lawn Irrigation Service for expert solutions to keep your artificial turf well-maintained and looking great all year round.
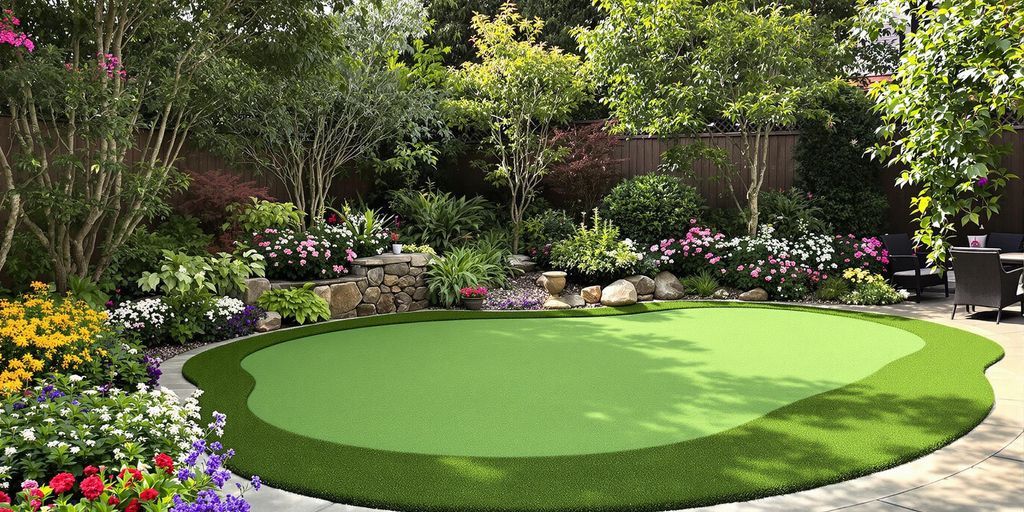
Planning the Layout and Design of Your Backyard Putting Green
Determining the Best Location for Your Putting Green
Finding the right spot in your yard is a big deal. You want a space that’s convenient, gets enough sunlight, and allows room for practice. Avoid areas with heavy foot traffic or where water tends to collect after rain. Check for a flat area, but don’t worry if it’s not perfect—slight slopes can add character to your green. Also, think about how close it is to your house or patio for easy access.
Designing a Layout That Mimics Real Golf Courses
If you want your backyard green to feel like the real deal, spend some time on the design. Start by sketching out a rough layout. Think about adding curves or unique shapes rather than sticking to a plain rectangle. Use a mix of short and long putts in your design to keep things interesting. A good rule of thumb is to keep the green around 10-15 feet wide and at least 20 feet long if you’ve got the space.
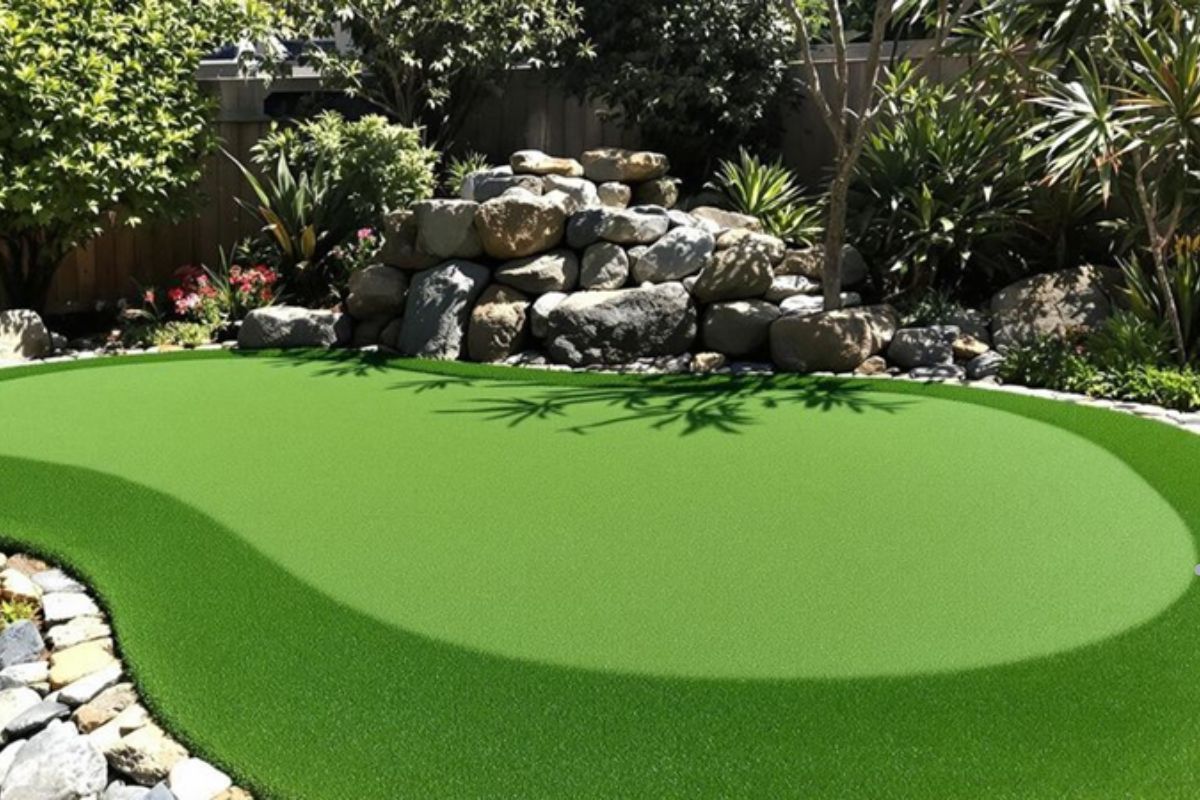
Incorporating Features Like Slopes and Breaks
This is where your putting green can really stand out. Small slopes and breaks make practicing more realistic and fun. You can create a slight incline by adding extra base material to one side. Just make sure the slopes aren’t too steep—it’s a putting green, not a mini-golf course! If you’re unsure, test the slope by rolling a ball and seeing how it behaves. Adding breaks or subtle undulations will challenge your skills and keep you from getting bored.
Preparing the Ground for Artificial Turf Installation
Clearing and Leveling the Area
Before anything else, you’ve got to prep the space. Start by removing any grass, weeds, or debris from the area. Use a shovel or a sod cutter to strip away the top layer of soil. For rough grading, grab a landscape rake to smooth things out. This step is key for a solid and even foundation. Once everything is cleared, lightly water the area with a garden hose to settle the soil. Compact it using a plate compactor or hand tamper to create a firm base.
Installing a Proper Base for Stability
The base is what keeps your putting green stable and long-lasting. Spread a layer of crushed stone or decomposed granite across the area. Aim for about 3-4 inches of depth. Use the plate compactor again to press it all down. Add another light spray of water to help the material settle. Repeat this process until the base feels solid underfoot. A stable base is the backbone of your putting green.
Ensuring Adequate Drainage for Longevity
Good drainage is a must if you want your artificial turf to last. Without it, water can pool and damage the turf over time. To avoid this, grade the base slightly so water flows away from the green. You can also install a layer of geotextile fabric to improve drainage and prevent weeds from growing through. Double-check the slope with a level to make sure the water runoff will work as planned.
Taking your time with ground prep might feel tedious, but it’s the foundation for a putting green that looks great and performs even better.
If you’re wondering whether driving on artificial turf is a good idea, check out our guide on proper artificial turf maintenance. Understanding how different activities affect your lawn can help you protect its durability and keep it looking great for years.
Installing Artificial Turf for a Professional-Looking Putting Green
Cutting and Securing the Turf to Fit Your Design
Once you’ve got your artificial turf ready, the first step is cutting it to match your putting green layout. Roll out the turf over the prepared base and let it settle for a few hours under the sun. This helps the material relax and makes cutting more precise. Use a sharp utility knife to trim the edges, following the contours of your design. Make sure to leave a slight overlap at the edges—you can always trim more later, but adding back material isn’t an option. To secure the turf, use landscaping staples or adhesive, depending on your preference. For larger areas, adhesive might provide a cleaner, more uniform hold.
Transform your backyard into a golfer’s paradise with an artificial turf putting green! Need expert advice? Call us today for professional guidance on design, installation, and maintenance to create your perfect backyard oasis.
Joining Turf Sections Seamlessly
If your putting green requires more than one piece of turf, joining them seamlessly is key to maintaining a professional look. Lay the edges of the sections side by side, ensuring there’s no gap or overlap. Use seam tape and adhesive to bond the sections together. Press the edges firmly and allow the adhesive to cure for the recommended time. A carpet roller can help ensure a smooth finish. Test the seams by running your hand across them—you shouldn’t feel any bumps or ridges.
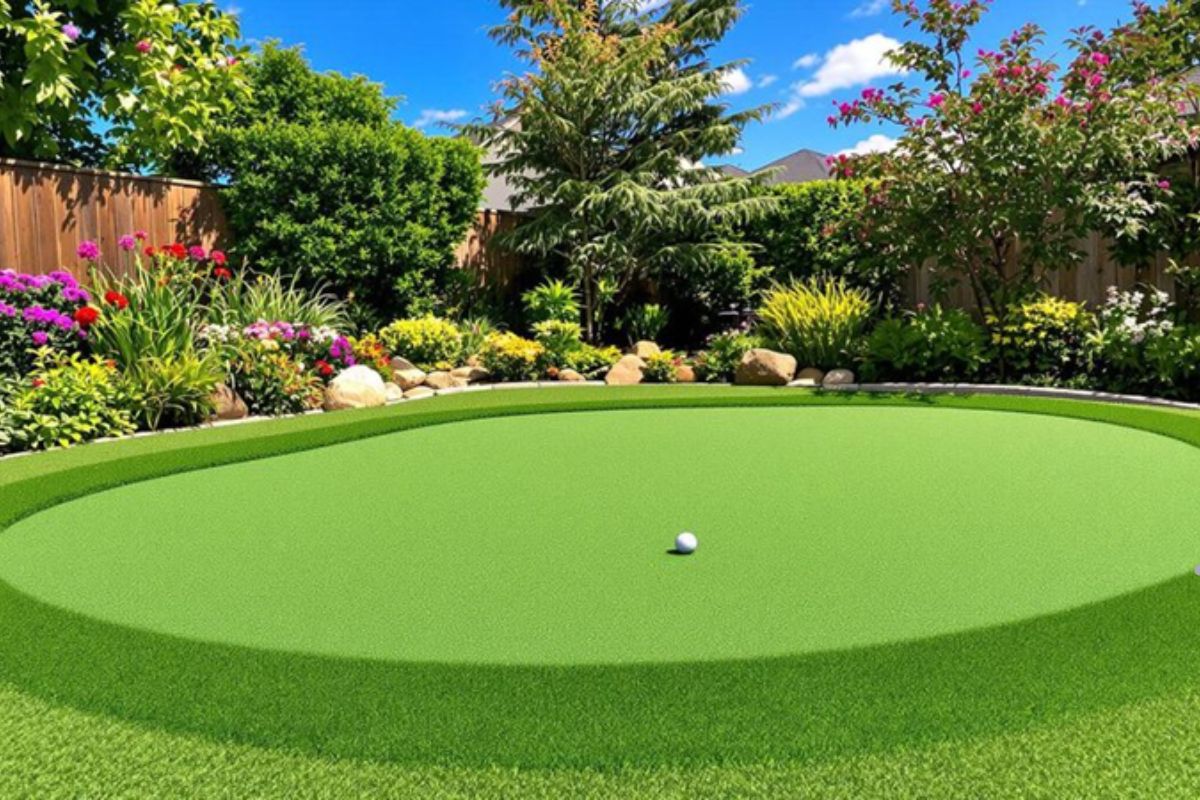
Adding Infill for Realistic Ball Roll
Infill is what gives your putting green its lifelike feel and performance. Spread a layer of silica sand or rubber granules evenly across the turf, using a drop spreader for accuracy. Brush the infill into the fibers with a stiff-bristled broom, ensuring it settles deep into the turf. This step not only improves ball roll but also keeps the turf blades upright and stable. Aim for a consistent layer of infill throughout the green, as uneven distribution can affect playability.
A well-installed putting green can transform your backyard into a golfer’s paradise, offering endless hours of practice and fun. Take your time with each step to ensure a flawless result.
By following these steps, you’ll achieve a professional-looking putting green that feels just like the real thing. And while the upfront investment—backyard putting greens—might seem steep, the long-term enjoyment and value it adds to your outdoor space are well worth it.
Customizing Your Putting Green for a Personal Touch
Adding Flags, Cups, and Markers
Adding the right accessories can make your putting green feel more like a professional course. Flags and cups are essential for creating an authentic experience. Choose durable materials for the cups, like plastic or metal, to ensure they last. For flags, consider weather-resistant fabrics that can withstand the elements. Markers can also be a fun addition, helping you set up specific practice drills or games with friends and family.
Creating Fringe Areas for Versatility
Fringe areas are those slightly longer grass sections surrounding your putting green. They’re not just for looks—they add a layer of challenge to your practice. Use different turf textures for the fringe to mimic real golf course conditions. This can help you practice chip shots or work on your short game. Make sure to blend the fringe seamlessly into the main green for a polished appearance.
Ready to build your dream backyard putting green? Our experts are here to help! Call us today for professional guidance on design, installation, and materials to create the perfect low-maintenance golf space at home.
Incorporating Landscaping Around the Green
Landscaping can really tie your putting green into the rest of your backyard. Think about adding plants, shrubs, or even small trees around the edges. Not only does this make the area look nicer, but it can also provide shade during hot days. You might also consider adding decorative rocks or mulch for a clean, finished look. Keep in mind that low-maintenance plants are ideal so you’re not spending all your time gardening.
A well-customized putting green doesn’t just improve your golf skills—it turns your backyard into a personal retreat.
Maintaining Your Artificial Turf Putting Green
Cleaning and Brushing the Turf Regularly
Keeping your putting green clean isn’t just about looks—it actually helps it last longer. A quick sweep with a stiff brush or a rake every week can keep debris like leaves or twigs from piling up. Brushing the turf also keeps the fibers standing upright, which makes your putts more consistent. If you notice dirt or spills, just rinse it off with a garden hose. For tougher stains, a mild soap and water solution usually does the trick.
Inspecting and Repairing Wear and Tear
Even though artificial turf is tough, it’s not indestructible. Check for any spots where the seams might be coming apart or areas that look flattened. If you spot issues early, they’re much easier to fix. For example, you can use turf adhesive to repair small separations. If a section looks worn out, you might need to replace it. It’s a good idea to keep some extra turf from your installation just in case.
Seasonal Maintenance Tips for Optimal Performance
Different seasons can bring different challenges for your turf. In the fall, stay on top of leaf removal to avoid buildup. During winter, avoid using heavy shovels or salt if you get snow—this can damage the turf. Instead, use a plastic shovel or a broom to clear the area. Spring is a great time to give your green a deeper clean and check the drainage system to make sure everything’s working properly. A little seasonal care goes a long way in keeping your putting green in top shape.
Regular maintenance doesn’t take much time, but it makes a huge difference in how your backyard putting green looks and plays.
Enhancing Your Backyard Oasis with Additional Features
Adding Lighting for Evening Practice
Imagine stepping out into your backyard at dusk, golf club in hand, and being able to practice your putting under soft, ambient lighting. Adding lights to your putting green isn’t just practical—it completely changes the vibe of your outdoor space. Opt for energy-efficient LED lights or solar-powered options to keep things eco-friendly. You can go for ground-level lights to outline the green or even install overhead fixtures for better visibility. The right lighting makes evening practice sessions not only possible but genuinely enjoyable.
Incorporating Seating and Relaxation Areas
Your putting green can be more than just a spot for golf—it can become a hangout space. Think about adding a small patio with comfortable seating. A few weather-resistant chairs, a side table, and maybe an umbrella for shade can turn your backyard into a mini retreat. If you want to go all out, consider a pergola or even an outdoor sofa with cushions. This way, you can relax between putts or just enjoy the view of your green space. It’s all about creating a spot that feels inviting and functional.
Combining the Putting Green with Other Outdoor Activities
Why stop at a putting green? Combine it with other fun backyard features to make your space more versatile. For example, you could add a bocce ball court or a small fire pit nearby. If you’ve got kids, a sandbox or a mini climbing wall could keep them entertained while you practice your swing. For a more formal look, consider a boxwood hedge and brick-bordered flower beds to frame the area. It’s all about making your backyard a place where everyone can have fun, whether they’re into golf or not.
A backyard putting green can be the centrepiece of your outdoor space, but the right additions turn it into a true oasis. From lighting to seating to multi-purpose features, there’s no limit to how you can make it your own.
Wrapping It Up
So, there you have it—your very own backyard putting green made with artificial turf. It might take a bit of effort and patience, but once it’s done, you’ll have a space that’s perfect for practicing your short game or just hanging out with friends and family. Plus, it’s low-maintenance, so you can spend more time enjoying it and less time worrying about upkeep. Whether you’re a golf enthusiast or just someone looking to spruce up your yard, this project is totally worth it. Now grab your putter and start sinking some shots!
Frequently Asked Questions
What type of artificial turf works best for a backyard putting green?
The best artificial turf for a backyard putting green is one designed specifically for golf. It should have a smooth surface for accurate ball roll and be durable enough to handle regular use.
How do I choose the right spot for my putting green?
Pick a flat area in your yard with good sunlight and drainage. Avoid places with too much shade or water pooling to ensure the turf lasts longer.
Do I need special tools to install artificial turf?
Yes, you’ll need tools like a utility knife, a compactor, and a turf rake. These help with cutting the turf, leveling the ground, and spreading infill evenly.
How do I keep my putting green clean?
To keep it clean, brush off leaves and debris regularly. You can also rinse it with water and use a mild soap for stubborn dirt.
Can I add slopes and curves to my putting green?
Yes, you can add slopes and curves to make your putting green more challenging and fun. Just plan them out during the design stage and shape the base accordingly.
Is artificial turf safe for pets and kids?
Most artificial turf is safe for pets and kids. Look for turf that is non-toxic and lead-free to ensure everyone’s safety.
Want to create the perfect backyard putting green? Our team is here to help! Contact Us today for expert advice on installation, design, and materials to bring your dream golf space to life.